The third installment of the Dragon Age: Redemption series is fitting titled "Josmael", as the young, lovelorn Dalish mage turns the tide of the story with one fateful yelp. This blog finds both our heroes and villains in the hidden cave of an ancient Elven god, thick in the heat of battle.
 Photo 1: Right from the start of DA:R pre-production, the hunt was on for a suitable cave to film this episode in. The fight choreography was going to be quite elaborate, and there were very specific location based requirements for the scene to play out properly. Unfortunately, there are not a lot of actual caves in the Los Angeles area!
We discussed building a cave on stage, but the budget was too restrictive to create a space big enough to be effective. Another issue was that the scene was meant to be lit entirely by torch light. We were not permitted to have open flame on the stage, and the cave would be way too intimate to try and sell the torch effect with a lighting gag.
 Photo 2: Plugging up one end of Bronson Caves ended up being the most viable option, since it was local, cave like, and we could use fire! I will openly admit I was against the idea at first, since the cave is so over used for low budget, and because the interior texture is much more like a carved tunnel than an organic cave. But ultimately we were able to dress it properly, and make it look like a different place.
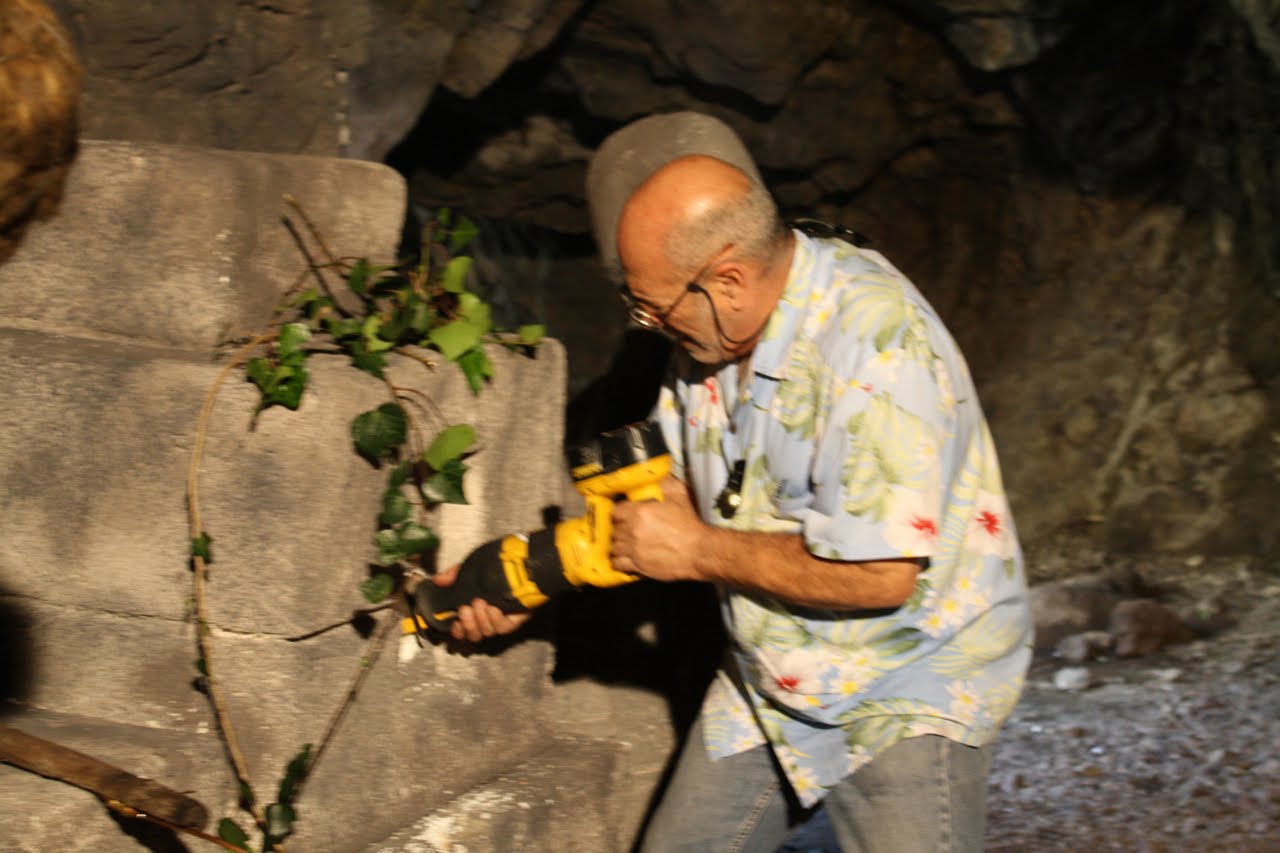 Photo 3: Our special FX supervisor carefully cut into our altar set piece to be able to run copper tubing from the torches to a propane tank, so the fire could be controlled safely, and burn for long lengths of time.
  Photo 4: The propane fire was smokeless, but the FX department ran a small hazer to add some density to the atmosphere. Combined with the heavily gelled amber and red lighting provided by Director of Photography John Bartley (The X-Files
 Photo 5: Tallis's party sneaks into the cave from a small entrance at the far side, and take cover behind an upcropping of stalagmites.
 Photo 6: This entrance was actually a third opening in the tunnel, a small outlet that forked off the main thruway through the mountain. It was pretty small, and since this cave was built for the Batmobile to be able to drive through, the ground was very flat.
 Photo 7: You can see how adding a few shapes can drastically change the look of an environment. The stalagmites were carved from scraps of styrofoam glued around wooden frames.
 Photo 8: Felicia Day as Tallis, preparing for battle with the Reaver Nyree.
 Photo 9: But Nyree wasn't the only henchman in the cave. Tallis and Cairn had to fight their way through multiple obstacles to get to Saarebas, including the dwarf Rukk, portrayed by actor Michael Munoz.
 Photo 10: Rukk may not have been the tallest member of Saarebas's band of misfits, but he definitely was not light on battlements! We plucked this painful mace from the BioWare weapons chart, and Armorer Mazin Dajani carefully recreated it from plates of aluminum, welded into a ball of doom.
 Photo 11: All the insane maces on the rack wouldn't save poor Rukk from the sting of Tallis's blade, though. Here, Felicia wears leg guards to slide under Rukk's mace, and deal a lethal blow and take the dwarf out.
 Photo 12: Felicia did a huge amount of the stunts herself, but for those few that were deemed too dangerous for the writer/actor/producer, a professional stunt double was brought in. We made a Tallis costume to fit Candace Hollinger, in which she pulled of some amazing stunt performances.
 Photo 13: The Qunari mage's other rogues were a pair of stunt performers who also had strong acting backgrounds, so they were cast in the roles, and did their own fighting and stunts.
 Alex Huynh played Ludd, who fought in an eastern style along side his twin sister, Lune. It was great to work with Tara Macken again. She actually did her first feature film stunt work as space infantry in my Sci-Fi channel movie Battle Planet .
.
 Photo 14: The rogue twins wielded mirrored weapons, fighting as reflections of each other. Lune held a sickle in her right hand, a hatchet in her left, and Ludd was the exact opposite.
Here, Art Director Bryan Fulk holds a printout of the Dragon Age II game asset for the sickle. It was mounted on foam core, cut out, and held against the ruler for scale so Stunt Coordinator Thom Williams could sign off on the proportions before we started building the final prop.
 Photo 15: The hatched game asset sent to us from BioWare. I really enjoyed the solidity of this weapon. It looked like it was cast as one solid pour of heavy iron.
  Photo 16: Here are the finished weapons as constructed by Mazin. The sickle blade was cut from a sheet of aircraft aluminum. I sculpted the handle to look like leather wrapped wood, but it was actually cast in a flexible urethane to provide some grip. The hatchet was cut on the CnC, molded, and cast in a light but durable rigid urethane with a wooden dowel run through it.
  Photo 17: During the fight scenes, we had a whole team of people that made sure all the weapons were properly cared for. They were held for the actors between takes, touched up and repaired if damaged, and hero and stunt versions were swiftly swapped out for the appropriate shots. Here, Leo Nasca, Katie Moest, Kamela Lim stand by with the arsenal.
 Photo 18: Outside the cave, Guild Director, and DA:R second unit director, Sean Becker, Bryan Fulk, and prop maker Kevin "Amish" Ivers take a break to see some daylight. It was hard to get your bearings staying in that dark and smokey cave all day!
 Photo 19: It was nice to step out side for a moment, especially since we had such a pleasant view! Nothing reminds you of the value of entertainment like the iconic Hollywood sign! It sits on the mountain overlooking Griffith Park, facing right toward Bronson Cave. That signal tower to the right of the sign is on the edge of the Disney lot, which rests just over that crest.
 Photo 20: Things are not looking so great for our heroes inside the cave, though! Saarebas collapsed the mouth of the cave on them during the fight, and they are trapped inside. The "avalanche" was actually a collection of styrofoam chunks, coated in spackle, and painted to look like rock.
 I hope you are enjoying these blogs, as I am trying to give you as much detail as possible about what was happening behind the camera to bring this show to life. Leave me a comment, or ask a question about the show below. And like and/or share this page! I really appreciate it. Can't wait to show you around next week's episode. It's my favorite!
Have a good weekend. Maybe I will see some of you at Long Beach Comicon!


